How to Install Pool Pump And Filter: A Practical Guide for Homeowners
The visible pump is only one part of this job. A successful result depends on the source, pipe or tubing, controls, power, and the conditions at the outlet, so document that arrangement before making the first change.
What you need for this job
- the exact model manual
- appropriate tools and approved replacement parts
- power and pressure isolation
- a clean, dry work area
- a way to observe flow, head, or the control cycle
Before touching the pump
Turn off and verify the relevant power, isolate water or pressure, and identify any automatic switch, controller, alarm, or timer that could start the pump. Keep sewage, septic tanks, wet electrical connections, pressure vessels, and confined spaces outside casual DIY work.
Details that decide whether the job will work
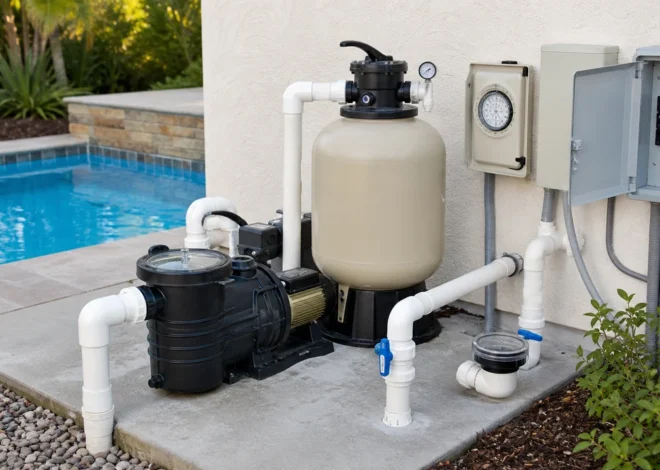
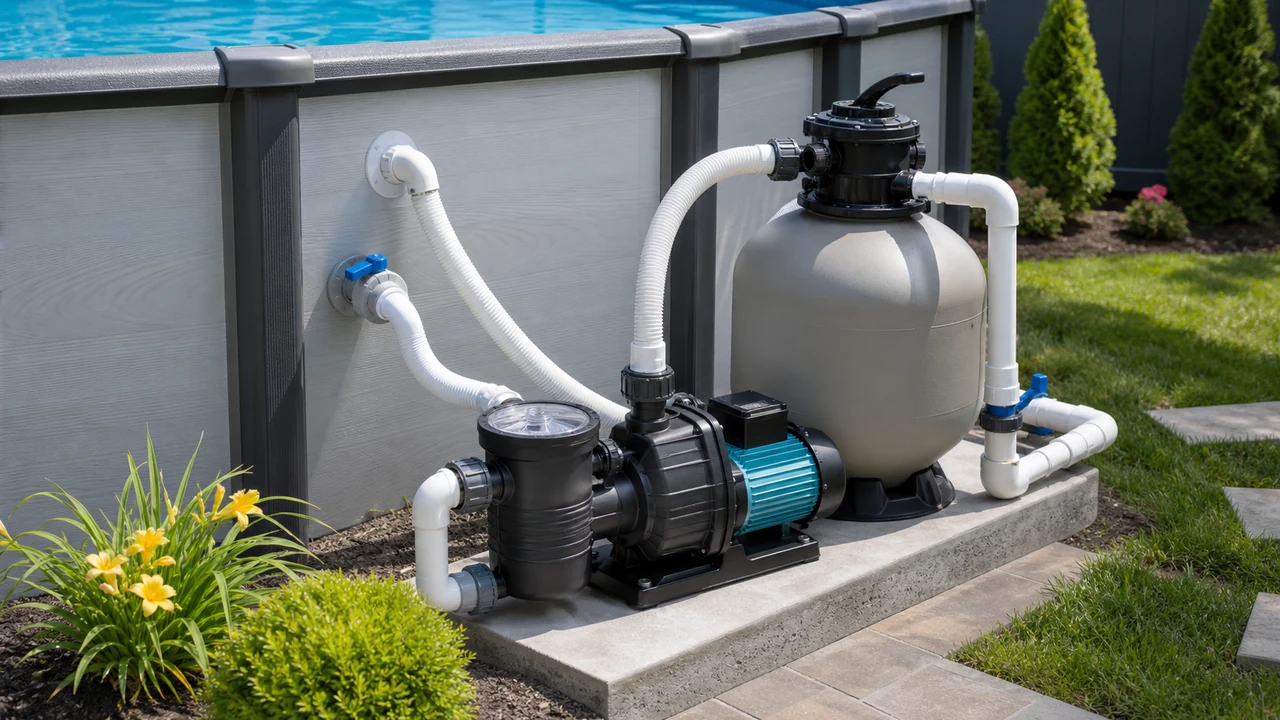
Map the equipment-pad hydraulics
Document the suction lines, return lines, valves, filter, heater, cleaner, and water-feature branch before disconnecting anything. The pump must be installed in the correct flow direction and paired with a filter that accepts its flow.
Use the approved electrical method
Pool equipment requires correct breaker, grounding, bonding, disconnect, conduit, and wet-location protection. Leave electrical terminations to qualified personnel and never work on a live pad.
Protect against stored pressure
Turn off power, close or arrange valves as directed, and relieve filter pressure before opening a strainer lid or filter tank. Do not restart with a lid, clamp, drain, or union improperly seated.
Prime without running dry
Fill the strainer housing or follow the manufacturer’s priming sequence, open the required valves, and watch for a stable basket and return flow. Stop if air remains, the pump cavitates, or the seal area leaks.
Set the filter and pump as a pair
Record clean-filter pressure and compare it with the pump’s operating range. Oversizing the pump can exceed filter or suction limits, while undersizing may miss turnover or feature demand.
Commission every operating mode
Test circulation, heating, cleaning, and water-feature modes separately if they use different valves. Check pressure, return flow, leaks, and automatic controls before the pad is left unattended.
Step-by-step procedure
Identify the system
Confirm pump type, liquid, source, endpoint, and control arrangement.
Make it safe
Turn off and verify power, relieve pressure, and keep water away from electrical connections.
Document the starting arrangement
Photograph pipes, wires, valves, and settings before disconnecting anything.
Perform the service
Follow the model-specific sequence and do not force fittings or bypass controls.
Reassemble
Use correct seals, pipe sizes, fasteners, and wiring.
Test gradually
Observe flow, head, leaks, sound, temperature, and control behavior.
Treat the equipment pad as a hydraulic circuit
The pump, strainer, filter, heater, chemical system, cleaner, valves, suction lines, and returns determine the result together. Photograph the existing valve positions and pipe labels before disconnecting anything so the replacement is not installed into the wrong flow path.
Relieve pressure before opening equipment
A filter or strainer can retain pressure after the motor stops. Follow the manufacturer’s shutoff and pressure-relief process, keep hands away from suction openings, and wait for the gauge to read safe before opening a lid or clamp.
Choose flow that the filter can accept
Pool turnover is only the first calculation. The filter, heater, salt cell, cleaner, pipe, and suction covers may each impose a flow range or pressure limit. A larger pump can make filtration and electrical costs worse when the rest of the pad is not upgraded.
Expect more than one operating mode
Circulation, heating, cleaning, spa spillover, and water features may use different valve paths. Test each mode that the owner uses and record clean-filter pressure. A pump that works in circulation may still be wrong for a feature branch.
Use qualified electrical service
Bonding, grounding, disconnects, conduit, GFCI protection, and wet-location rules are part of pool installation. Keep electrical diagnosis outside casual DIY work and do not restart equipment with an unsecured lid, union, or drain plug.
If the finished job behaves differently
The pump will not prime
Check water level, skimmer flow, valve position, lid seal, basket, suction leaks, and the manufacturer’s priming sequence. Stop if the pump runs dry; repeated attempts can damage the seal.
Pressure rises after a new filter or pump
A dirty filter, closed return, undersized pipe, auxiliary equipment, or an oversized pump can raise resistance. Compare clean-filter pressure and flow with the pad’s limits before increasing motor size.
The water is not circulating evenly
A valve may route flow to a feature or cleaner, or a blocked return may reduce the farthest outlet. Map the active path and test modes separately instead of changing the pump based on one return.
The motor runs but protection trips
Repeated trips need electrical and mechanical diagnosis. Isolate the equipment and use qualified service for the breaker, bonding, grounding, motor, and wet-location protection.
How to verify the result
The system completes a normal cycle, delivers water or air as intended, and does not leak, overheat, or trip protection.
If the procedure does not work
Stop rather than repeating the same start-up cycle. Recheck the model, source, valve positions, pipe or tubing, control signal, and actual head. If the next check involves live wiring, a sealed system, sewage, a well, or a buried line, arrange qualified service.
Common mistakes after the main job is finished
- Leaving a temporary hose, bypass, jumper, or extension cord in a permanent installation.
- Closing a valve or filter path that the pump needs for cooling or flow.
- Hiding the float, alarm, controller, cleanout, or service connection behind a finished surface.
- Testing only at zero demand instead of under the flow or pressure the system must deliver.
- Changing a switch, fuse, pressure setting, or controller parameter without checking the exact manual.
- Forgetting to inspect for leaks, backflow, air, vibration, heat, or abnormal cycling after shutdown.
Keep the repair from becoming the next failure
Leave the pump, switch, valve, cleanout, and connection points accessible. Record the normal pressure, flow, water level, runtime, or cycle behavior so a future change can be recognized early.
A useful handoff record
| Record | Why it helps |
|---|---|
| Exact model and settings | Prevents a future replacement or adjustment from being based on a similar-looking unit |
| Normal operating point | Provides a reference for pressure, flow, water level, or runtime |
| Connection and valve arrangement | Shows how the source, pump, controls, and endpoint are meant to work together |
| Date and service performed | Makes recurring faults and maintenance intervals easier to identify |
Frequently Asked Questions
Can I use a generic replacement part?
Only when the manufacturer or a qualified supplier identifies it as compatible with the exact model. Similar dimensions do not guarantee correct operation.
Why should power be isolated?
Pumps can start automatically through a float, pressure switch, timer, or controller. Isolation prevents unexpected movement and electrical contact.
What if the pump still fails?
Stop and compare the result with the manual’s troubleshooting sequence. A source, pipe, control, or endpoint problem may remain.
Should I test under full demand?
Use the controlled test stated by the manual, then verify the actual operating condition. Do not create a hazardous pressure or flow condition just to test capacity.
When is professional service needed?
Use it for live wiring, wells, sewage, pressure vessels, buried lines, pool suction, or any task the manual reserves for qualified personnel.
Bottom line: The procedure is complete only when the pump performs a normal, controlled cycle and the surrounding system remains safe. Use the exact manual for details that this general guide cannot establish.